Showing posts with label crafts. Show all posts

Saturday, December 14, 2013

Kristen: 9 Homemade Civil War Christmas Gift Ideas

Perhaps the most fulfilling time of year approaches: Christmas. Nothing fills me with more joy than battling through crowds on black Friday and wrestling an old lady for a necessary Tickle-Me-Elmo. Please note the sarcastic tone I've taken thus far...

I've decided to come up with a list of gift ideas, just little things with the Civil War reenactor in mind. All of these have been featured with tutorials on my blog, so if you're new or want pictures, I've made it easy! So far, here's a list to get you started:

1. Travel bags: I have a post here that shows how to make these. It could be an afternoon project!
Cost: These can be made with leftover materials, or you could go all out! $0-$100
Time: I tend to take breaks while sewing. If you make this simple with less embellishment and use a sewing machine, this could be a 2-6 hour project.
Skill Level: Sewing intermediate. Need to know basic stitch and buttonhole.

2. Thread Waxer: It's an acorn, how can you not love it! I can show you how to make that here.
Cost: Beeswax ($10), play-dough ($1), string/soutache ($1), bead cap ($1-$3). Total about $15-$20, making dozens of them.
Time: At least 2 hours, plus wax melting time.
Skill Level: Not setting yourself on fire, patience.

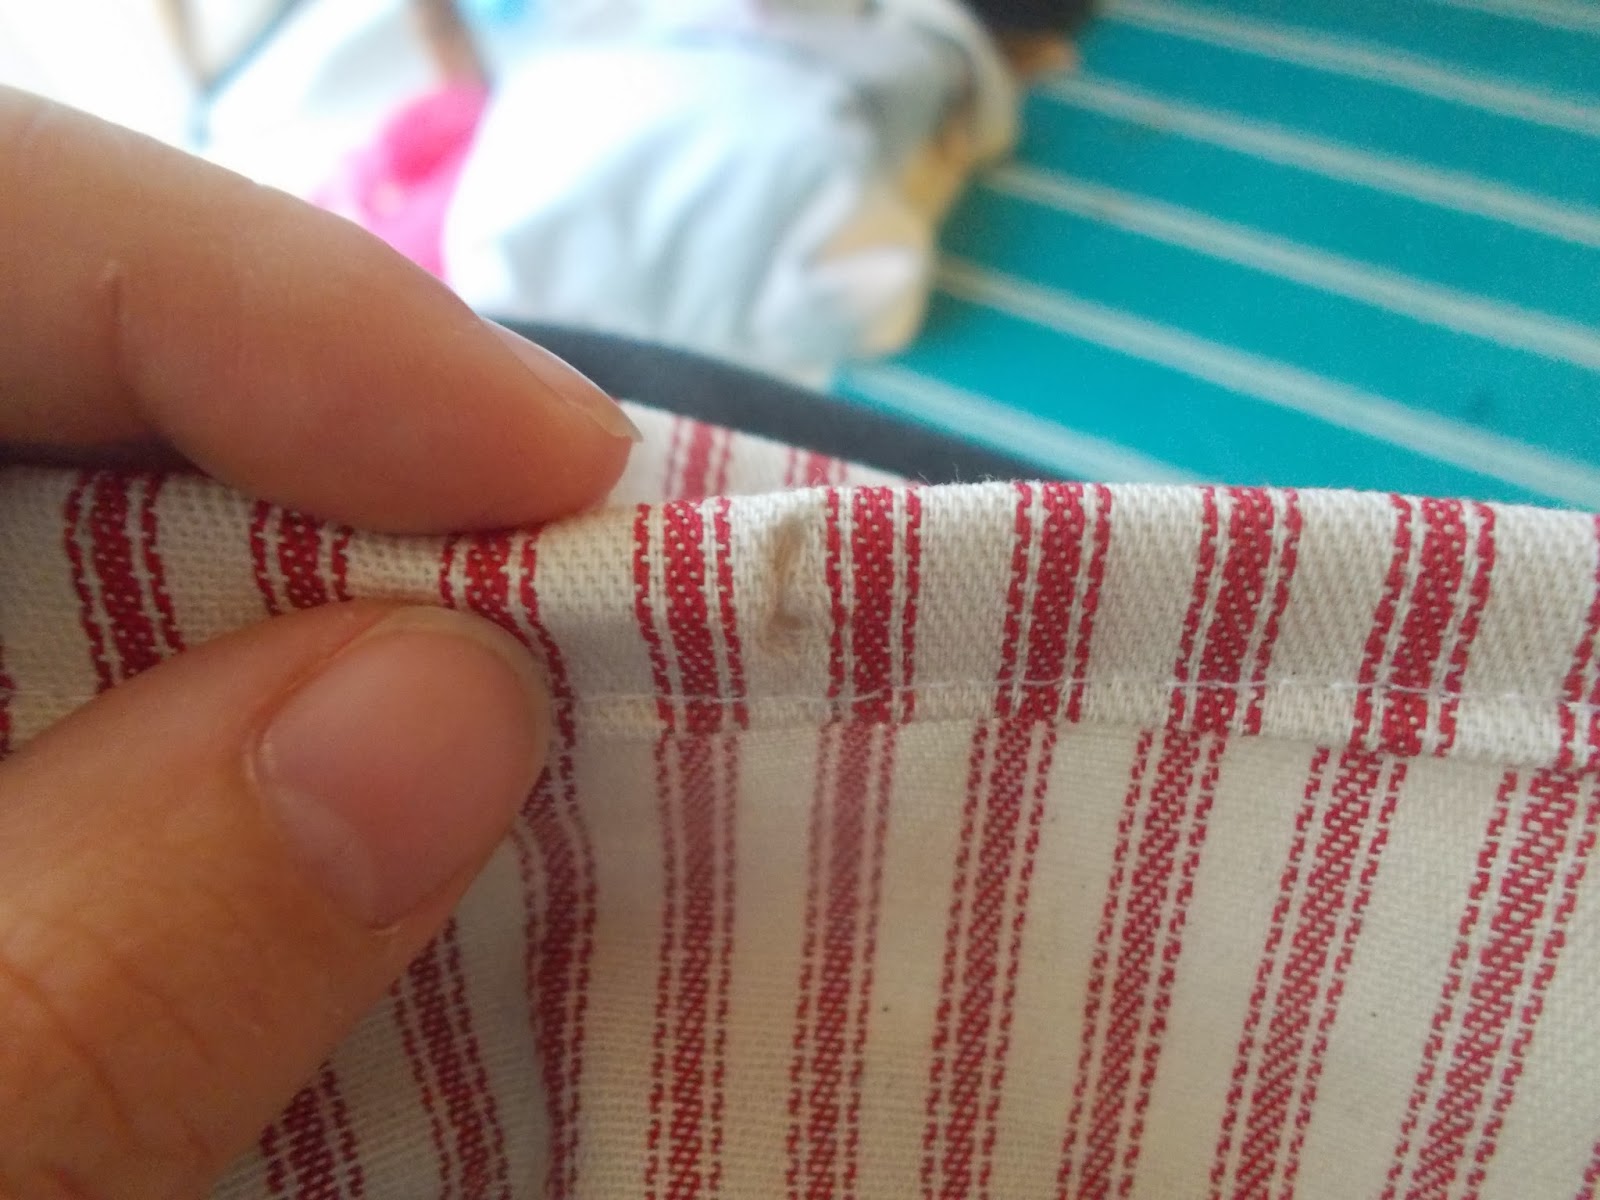
3. Handkerchief: Really easy, an awesome gift for men and women, tutorial found here.
Cost: About $9 a yard here, with that making at least 3-4 hankies. Thread from stash.
Time: 2-3 hours each, depending on skill level.
Skill Level: Sewing Intermediate, hidden stitch.
****Special Note! Make your hems much smaller than I did!

4. Hair Flower: I've tried the basic gimping technique multiple times here, here, and here. A very unique gift, especially when placed inside of a necklace. If you can make one, it will be a very unique and thoughtful gift, especially for a loved one! 
Cost: $0-$15, depending on the jewelry/frame you put it in
Time: Practice makes perfect! Anywhere from 4-8 hours. 
Skill Level: Wrapping hair around a stick. Seems easy, incredibly frustrating!

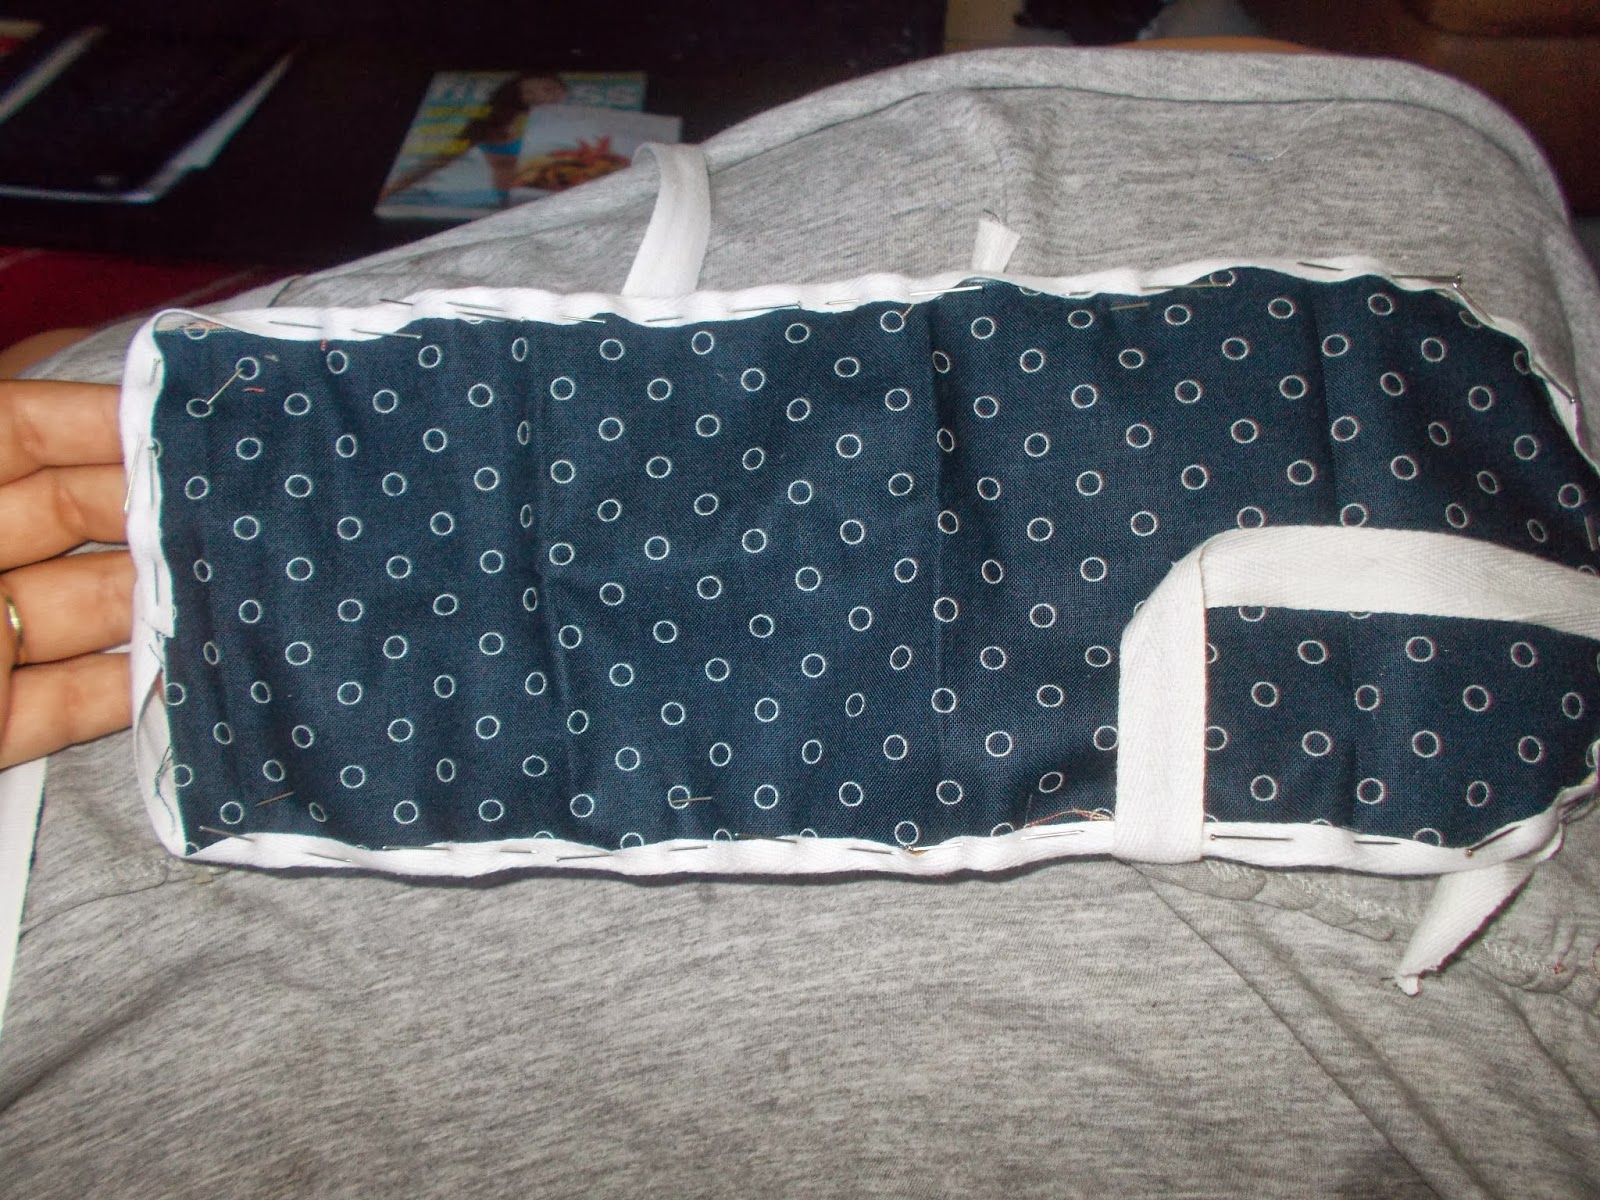
5. Housewife: I have a housewife tutorial, right here. Can be good for both men and women!
Cost: $0-20. Honestly, this cost me about $5 for scraps and all the twill tape.
Time: 2-3 hours, with generous eating time allotted.
Skill Level: Sewing Intermediate, basic and invisible stitch. 

6. Spectacle Case: Can be for males or females! Check it out here.
Cost: Leftover supplies, 1/2 yard fabric and cotton soutache. Total $3-10 with leftover supplies.
Time: 3-4 hours
Skill Level: Sewing Intermediate, whip stitch and tacking down soutache.

7. Basic "hiding" bags: A gift any reenactor will love! See it done here.
Cost: Probably free from stash-leftover fabric, any thread.
Time: 10 minutes or less. I've got it down to 3.
Skill Level: Sewing basic, or machine perfection!

8. Cooler cover: One of the best presents I ever made myself! If you need a different thing covered, just make sure to get the right measurements!
Cost: About $10 for fabric, more if using actually treated stuff.
Time: An hour or two with the sewing machine, more if by hand.
Skill Level: Sewing basic, emphasis on measuring skill!

9. Beaded Butterfly: Are you in the mood for butterflies? These things make the perfect little additions to bonnets or hair pieces. Documentation was used to support nature's colorful friends.
Cost: $5-10, beads and wire.
Time: 15-30 minutes
Skill Level: A good set of eyes and finger dexterity

Happy gift-making everyone! And if you don't feel like making anything, you can always check out my etsy shop, The Victorian Needle.

~Kristen

Monday, December 2, 2013

Kristen: Acorn Thread Waxer Tutorial

Seriously, I should sleep someday. How do I make time for this?

Well, dear reader, the fact is that I DO make the time, and you are the one to benefit for it! (Also, I benefit for having a creative outlet for my energy). Today's tutorial involves the acorn thread waxer, or as I affectionately call it, the project-I-really-want-to-do-because-I-don't-see-many-people-with-it.

It all began on pinterest. O, that obsessive online forum that sucks the very life from my cheeks! One day I was minding my own business, perusing that sweet addiction, when I can across this picture.

IT MUST BE A MISTAKE! NOTHING THAT PRECIOUS COULD ACTUALLY EXIST! BUT THEN...
http://www.ebay.com/itm/ANTIQUE-VICTORIAN-FIGURAL-RASPBERRY-THREAD-WAXER-c1890-STERLING-Chatelaine-Fob-/271067317168?pt=LH_DefaultDomain_0&hash=item3f1cdf03b0

My mind racing, my heart pounding, I kept finding more images...

http://i.ebayimg.com/t/Unique-pair-of-Sterling-Cap-Strawberry-Emeries-1-is-Wax-/00/s/MTIwMFgxNjAw/$(KGrHqZHJBYE9uMIY7JsBPiG(95RlQ~~60_57.JPG?rt=nc
http://www.ebay.com/itm/VICTORIAN-wax-BLACK-RASBERRY-BUNCH-STERLING-SILVER-leaf-cap-for-waxing-thread-/271293932903?pt=LH_DefaultDomain_0&hash=item3f2a60e567

It started to make sense. I'd been carrying around this lump of wax, having already lost previous ugly lumps. It was an embarrassment, an ugly outfit that I wore for its utility, not style. Why not carry a little thread waxer on a string, in a pleasant shape? Next came the historical research...

Godey's Lady's Book, 1864

Yes, they do exist in the wax form, not only in real life examples, but in Godey's Lady's Book! Determined, I decided to give it a try.

1. Start by melting the chunk of wax in a double boiler. Since I am too lazy to buy one, I simply put water in one pot, and the other in it with wax. WARNING: You might burn yourself. Don't be cheap like me, buy yourself a double boiler.
2. Prepare your mold. I just pressed this acorn top into the play-dough. That is the little soutache that I held in it while it tried (1 minute at the most). 
 3. When it is completely dried, remove play-dough, slip on bead cap, and enjoy your work!
 4. Or you could admire how many went so terribly wrong...
 Please...put us out of our misery...

My creative side satisfied, I went to bed. Just kidding! I had to stay behind and clean up that massive mess I made in the kitchen. It was totally worth it for that one acorn!

There is nothing more fulfilling than having an experiment work!

~Kristen

*******Hey everyone! Voting for the American Duchess Photo Contest continues until Fri., December 6th! I am currently in 2nd place!

UPDATE: The contest was canceled due to a cheater.

Thursday, November 21, 2013

Kristen: Cloth "hiding" bags

If you recall, dear reader, that adorable little blue/red and white fabric that I used for gift bags. Let me just post another lovely picture:

These little things are incredibly easy to create. Yet I've been a beginner seamstress before, and I understand the need for more concrete direction, and possibly pictures. They are so useful, so essential to the reenactor's toolkit, that I must post a quick tutorial!

Cloth "hiding" bags
1. Cut 2 squares of fabric. The size doesn't really matter, just as long as they are identical. I trimmed my edges with pinking shears to cut down on fray. Pin the sides together, with the pattern you want on the outsides on the inside.
 2. Sew around three of the edges, leaving a fourth open. This is the mouth of your bag.
 3. From the inside, roll in fabric to create a "tunnel." Roll the raw edge under into this tunnel, and pin down. It does not have to be too big, but just enough room to thread a ribbon through it.
 4. Sew down the edge that you rolled under.
 5. Poke a little hole on the inside-large enough for a safety pin!
 6. Thread your ribbon with a safety pin.
 7. Pull the safety pin through the tunnel you created. If you have trouble with this part, you might have to pull the pin through from the opposite direction. Tie off...
 8. And voila! A little cloth bag.

I made 20 of these for the baby shower...I had a system created where it would only take about 3 minutes each on the sewing machine! These would make an amazing gift for a reenactor, as we always seem to need them...

Here's a quick list of things you can put in them: car keys, cell phone, drinks of any kind, sewing supplies, money, napkins, snacks, writing supplies, cameras, children...pretty much anything! I try to bring at least a few to each event, even when I day trip (bags, not children).

So if you are looking for a quick car trip project, or a gift for anyone, here you go. I will be putting this little red one up in my etsy shop soon too, in case you are too busy to make one yourself (no judgement here...I probably should have done the dishes today...)

Until next time!

~Kristen

Sunday, November 17, 2013

Kristen: Prizes for Baby shower

So in case you were wondering, here are the prizes that went into those little prize bags. I tried to be as accurate as possible, and used whatever I had sitting around my craft room.
Small cloth needle books with wool pages
Thread waxers in shape of acorns
I also added a little thread holder
Homemade lip balm with shea butter, coconut oil, and olive oil in tin cases
All different pairs of earrings made with period accurate stones and 14k gold
Cloth bags that I made

You are probably beginning to see the scope of my madness. I make Civil War jewelry, and even have an etsy shop where I sell it! My lip balm/lotion is a recipe I often make for family and friends. As you well know, sewing is quite a hobby as well...

I truly enjoy making prizes for other people. In the past year, I've already made two dresses for friends, and countless little things for some of the newer members of the 21st Michigan. There's something amazing about giving! So dear reader, I will be giving you tutorials for most of the things I made for the shower! Be ready for more posts in the next few weeks!

~Kristen


Thursday, November 7, 2013

Kristen: Civil War Handkerchief Tutorial

Busy busy busy!

Another day, another tutorial! I've been in a teaching sort of mood lately (ha-I'm a teacher and I play one on tv!) Hopefully I am inspiring others with my beautiful writing. If not, then at the very least I've spent 20 minutes relaxing while I write!

I actually had a hard time with this one. At first I had thought Civil War handkerchiefs were those small, dainty things. Yet there are not many people making/using them in the hobby. I keep nearly a dozen little cloths that serve a handkerchief's purpose, but they don't look very ladylike (or clean at the end of an event!) My research has taken me to a few different places, which I will share with you below:

The Workwoman's Guide: 1840
Pocket Handkerchiefs
These are made of French cambric, fine lawn, Scotch cambric, cotton, or silk; the former are chiefly worn by ladies, and the latter by gentlemen; lawn and Scotch cambric are used by young persons and children; cotton handkerchiefs are confined to the working classes.

Ladies' pocket handkerchiefs are usually eleven or twelve nails square; they are purchased woven on purpose with borders. Sometimes very fine cambric may be procured eleven nails wide, which many persons prefer to the bordered handkerchiefs; these are often made with broad hems, half or three quarters of a nail deep, and a row of open veining worked at the bottom of the hem, or a narrow edging of lace is sewed all around.
(Please note that a nail is 2.25 inches)

From 1858, a little snippet from Godey's. No mention of size though...

Searching through the sewing academy (http://thesewingacademy.org/), most handkerchief sizes seem to lie within the 18-30 inch category. Not so much the dainty little things I find in the thrift store so often!

Without waiting any longer, here is my quick guide. Please forgive the wrinkled fabric-no matter how hard I try, my clumsy fingers muss up everything! I used 100% pima cotton, a fine recommendation from the great Glenna Joe Christen herself.

 1.  After cutting my 19x19 inch square, I rolled all of the hems under, making the border about an inch around. Pin down (be careful not to poke yourself, your blood will clash with the cotton).
 2. You will now begin an invisible or hidden stitch. First, pull your thread from the inside of that rolled hem. It should poke through like so...
3. Next, you will take your needle and pick up only a small thread, but not too small! You don't want it to show through but you also don't want to break it.
 4. Take your needle through the tunnel created by the roll of your hem. Poke it through the other side (this will take practice-don't get frustrated, as your sweat will clash with the cotton).
5. Pull through and hook on to another thread, repeating the process! When finished, it should look mostly like this on the inside(minus the wrinkles).
6. The outside will look as if there is no thread. The joke's on them! There is thread there, but it is so small that no one will be able to see it.

These handkerchiefs make the perfect little accessory or gift. You could also embellish them for mourning, though I've yet to have time for that! It seems that all the beautiful, fashionable young ladies are wearing handkerchiefs these days...
 Gorgeous!
 A fine example of womanhood!
That handkerchief sure compliments her overall awesomeness
**Thanks to Mr. Giorlando for photos that have contributed to my inflated ego

I've already completed a few of these lovely accessories, and will be adding them to my etsy shop very soon. So if you are one of those people that simply MUST have one, but lack the sewing skills, I will oblige you with the opportunity to buy one (I've really not seen any for sale, though I'm sure they exist). On that note, I must leave you for another project!

Coming Soon-A lovely post about another lovely project by a lovely author...

~Kristen

Friday, November 1, 2013

Kristen: Civil War Housewife Research and Tutorial

Hello again dear reader!

In the midst of baby shower planning, I have found time to give you a brief tutorial on these little Civil War housewives, as well as a bit of research. Would these not make the perfect Christmas/Birthday gift? I won't include the descriptions, but I will say they are usually made with leftover scrap fabrics...

Godey's 1864
Godey's 1862

I also know that Ann Worden Bauersmith has an entire book dedicated to such delicious endeavors, and that can be found here. I would strongly suggest buying it; I will hopefully receive it for Christmas!

In the meantime if you want to make a quick needlebook, here's my little tutorial. There are other how-to's on the web, I know! I'm of the mind that if it only takes one picture/instruction to help one person, then this was useful!

1. Cut out 2 long pieces rounded on one end. I used 2 contrasting fabrics.
 2. Cut two little squares for pockets. I also cut rounded white fabric to store needles.
 3. Hem those little squares to finish the edges. I used a hidden stitch.
 4. Tack those down to the inside fabric, sewing the bottom of the pocket. Add that needle fabric at the top (simple stitch). At this point you can also add some sort of layer between the outside/inside, but it's not necessary.
 5. Next, bind the edges with either self fabric or be lazy like me and buy cotton twill tape. I promise not to judge you either way...
 6. The inside should look like this, unless you did something wrong. Feel good about yourself if you did it right.
 7. Add a little of that tape to the outside to make a tie. Voila! Finished!

The whole process only takes a few hours or less! I will have this one available in my etsy shop in a few days, so if you are intimidated by the tutorial but still want one, you can have it!

I feel another sewing project coming on...

~Kristen

On My Bookshelf: December

December has been a really rough month. Between what happened in Oxford (not far from where I live...) and just the general pandemic issues,...