Tuesday, April 30, 2013

Eating Authentically at an Event by Wendi Schroeder- Becky

Wendi Schroeder is a member of Kris, Carrie and I's Civil War reenacting unit, the 21st Michigan. She wrote an article about "eating right"; the perfect foods for reenactments. With convincing of another member, Mr. G, her article was published in Citizens' Companion May/June 2011 issue.

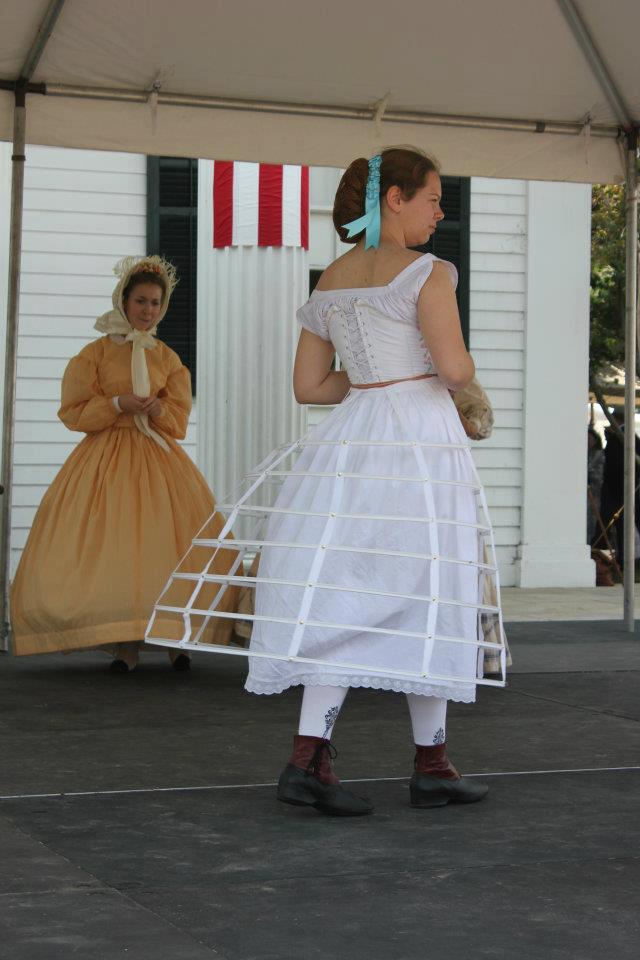
Mrs. Schroeder has been reenacting ever since Ive known her and she strives for accuracy and authenticity. She is one of the fine women I look up to!

Eating Authentically at an Event
Wendi Schroeder

Knowing that it's just as important to get the little things right at a reenactment, taking a look at the food you bring can help improve your impression yet one more notch. Eating according to what was available in a given month can help you come that much closer to being "there".

This doesn't mean that you can't eat very well for the weekend. You can bring a surprising variety of things to camp throughout the year. As an added bonus to eating seasonally, it's cheaper. Things still ripen around the same time every year.
Before I start, please understand the limitations of this article. It's NOT an exhaustive list of everything you can bring, for that you really need to start reading antique cookbooks.
That being said…

Let's start with April. This is the end of the winter season so you would most likely be using up things in the root cellar.
In the meat category, Ham would be very appropriate since it is getting warmer and whatever is left in the smokehouse isn't likely to keep much longer. (I personally suspect that's how Ham for Easter got to be so popular). If you are willing to be a bit more adventuresome there is also lamb and veal (newborn animals that didn't make it were not wasted). Fresh beef maybe but most likely there wouldn't be any left. Salted beef would be much more likely.

For vegetables, you would have the last of the potatoes, winter squash, carrots, onions, dried beans, and perhaps fresh asparagus if you grew it.
There would also be fresh lettuce especially if you had cold frames or hot frames to grow them in.
Pickled items of all sorts would be on the pantry shelves, cucumber pickles, watermelon rind pickles, sauerkraut, pickled peppers, pickled onions etc…

For fruit you would have jellys, jams, and the last of your cellar apples. Raisins would be around, but pay attention to your economic position, as they would have been imported. I can't find evidence that grapes were grown in Michigan during the War, but if anyone has information to the contrary I'd be delighted to see it.
As a side note…this is what you plant in April in Michiganonions, potatoes, peas, lettuce, leeks, cabbage. If you plan your breeding your sow is farrowing and you have piglets to raise. If one doesn't make it you have sucking pig to eat for Sunday.

Ok, moving on to May.
In May you would have eggs, (the chickens are laying again HURRAY). You would also start to see radishes, more lettuce, and new peas perhaps.
May is when the main garden goes in. You plant tomatoes and peppers and beans and corn and squash and pumpkin and melon and cucumbers and whatever else your little heart desires to put into the ground. New chicks are being born about now.

June is when strawberries are in season. Your meat poultry is coming along nicely, but they aren't quite big enough to eat yet. But the laying hens are going gang busters and the cow is giving lots of milk (or the goats). You are still eating lettuce and radishes. This is a great salad month.

This is when you shear the sheep and take the wool in to be washed and carded for spinning…unless you do this all at home. You also plant your cabbage and peas for the fall garden about now.

July: The peas are getting ripe. You have new potatoes (which are very small). Blueberries are in season. You might get some cabbage out now, and the Broccoli is ready to eat. You have some meat chickens (born last fall) that are big enough to eat, so you start butchering them one or two at a time as you want one for dinner. Early raspberries are in now too. It's too hot for the lettuce to be doing well, so it's rather scarce.

August: You are starting to get beans. A melon or two is ripened, and if you planted short season corn it should be coming in towards the end of the month. More potatoes, these are larger, especially if you planted midseason varieties. Tomatoes and Peppers are starting to come in and they pretty much overwhelm you at the end of the month. Peas are in completely and they start to wane early in August. The pigs are growing nicely and you are getting really tired of poultry and salted beef and pork. However, the fish are biting and fresh fish can be had whenever someone has the time to go catch some. You can harvest onions now too, or you can leave them growing until cold weather.

September: This is when you kick yourself for planting a large garden. EVERYTHING is coming in. You put things down cellar and dehydrate a lot of things in the sun, and if you know how and have the jars you put things up in those fancy new mason jars, which requires HOURS of boiling for some things. (Modern note…if you want to try canning do NOT water bath can anything but fruit and tomatoes-botulism still exists.)
Apples are starting to ripen and so are the peaches. Lots of pie right about now.

October: The garden season is finally starting to wind down. You still have beans and late ripening squash, but pretty much everything else is put up for the winter. Apple harvest is in full swing although you probably have all the peaches dried or made into jam already. The pumpkins are finishing up as is the squash. Your late corn is ready to pick and your potatoes are ready to dig up…hurry and do this last before the ground freezes. You have fresh apples and dried apples and apple cider. (Or hard cider if that's your preference.)

November: Butchering time is usually around the third week of the month. Those cute little piglets from spring are nasty tempered ugly hogs and you are glad to see the last of them; although processing one pig takes three days if you have lots of help in the kitchen. You also butcher your beef at this time, and the deer hunters go out to get some venison.

And that takes us to the end of the season. If it seems like this was more about gardening/farming, I chose to structure it this way to illustrate how eating was directly tied to the gardening year and the weather, until refrigeration and international shipping allowed us to eat whatever we wanted to all year round. And there are some exceptions. Larger cities might have access to more fresh meat in the summer since a farmer could sell a whole beef or pig in portions at the Market. The Military would also have more access to fresh meat in the summer since there were enough men to eat a whole animal before the meat spoiled

As I said in the beginning this doesn't cover everything. But if you pay attention at the grocery store to what's on sale and what is listed as locally grown you can get a pretty good idea of what your options are month by month.

You can also get really adventuresome by reading cookbooks, I've read some recipes that I wouldn't even WANT to try, but they are out there for the culinary brave.
Some things I didn't mention (like bread) because they were available year round. Wheat stores very well until its ground into flour. Oatmeal stores very well.
I hope this little paper has been informative. I'm hungry now, so I'm off to the kitchen to find a snack…
#

I know its a long read, but very informative! I hope you take something into consideration and "eat right" this season!

Monday, April 29, 2013

How to Get the Middle Victorian Look: Dressing to the Nines Part 2- Becky

Have you picked out an experienced seamstress? Or have you embarked on the challenging road of making a corset? Either way, you are on your way to get the perfect silhouette!


The under petticoat or modesty skirt was a slip to cover the wearers backside and could be used from the un-tucked material of the chemiseWith a hoop, men and others would be able to literally "see up the skirt" of the woman who did not wear an under petticoat. 
Under petticoats were made of cotton and other like materials. They were also made of red flannel to "prevent rheumatism" in the winter and colored wool for the hard work at the farm!
There is no need for pattern for an under or over petticoat. Under petticoats are comfortable with a 90 inch circumference. You can accomplish this with fabric 45" wide. You would need to measure the length you desire and cut three panels. Gather the top to a waistband that fits your measurement and hem! This is also do-able with larger width fabrics.  


The hoop and or cage is what makes the shape of a Victorian woman. In 1830's women would pile on under petticoat after petticoat to make the desired bell shapes. Then the late '40's and '50's women were wearing the hoops. There are many shapes and widths a hoop could be. 


Ok un minuto.... I just googled searched "Civil War Cage"... This is what I got:
HAHAH!

You can decide on a hoop by your height and body type. Here are some CDVs that show different hoops and cages: 


1860's original cage
The Laced Angel's repro
A cage is a skirt support that has no fabric between the boning, but a hoop has the fabric. My cages, shown below, is made from 7 bones and vertical twill tape connected to a waistband. I bought this from Kay Gnagey at her Originals By Kay store. I ware a cage of 108 circumference and think it is a good size for me. I would also look good in a 90 circumference too. I would be able to layer on over petticoats on this cage if I wanted to make the skirt fuller.


The over petticoat is created with the same formula as the under petticoat, but you want to make sure that it fits over your hoop! The purpose of an over petticoat is not so much as modesty, but to make the skirt wider and to hide the bones. 


Some times Im a derp and look derpy like this:  but this is a great example how the bones show through the dress. I do have a petticoat on, but only one. A great way to prevent this could be to have multiple petticoats or to have a petticoat with tiers. Buy the way, Ken said something really funny and the wind was blowing hard. 

The dress is the last garment you put on to "dress to the nines". I once read a book which was published in 1863, that listed 7 types of dresses! A practical woman would not have so many dresses. One dress may have been and 1)everyday dress, 2) Sunday dress for church, and 3) an evening dress for dinner parties or balls!
But think of the type of woman you are portraying. Are you an immigrant farmer that came over with what she  had on her back? Are you married to a wealthy business man? Different personas will determine what fabrics, prints, styles you will be wearing!

My favorite "go-to" impression is more fact than fiction! I portray a German farmer and I only have one dress. I wear the "required" underpinnings such as: 1) Chemise, 2) drawers, 3) socks, 4) shoes, 5) underpetticoat, 6) a corded petticoat (an underpetticoat with string sewn into the skirt to make a "fuller" look), 7) and my dress!

I know the watch and necklace should not be in the picture!
My dad portrays a poultry farmer. He really does sell eggs to the other reenactors at events! If you are camping a MI event and forgot eggs, you're covered! 
 

Saturday, April 27, 2013

How to Improve Your Campsite Part 3- Becky

Here is the last part of the notes I took at Mrs. Roots presentation. I think all of the suggested are great. I hope you will take some advise in this years season! Good luck!

Problems While Storing
  • Ziplock Bags
    • can leak, but great for solid foods
    • keep them on hand for storing open foods
    • also can be used inside of tinwear and cotton bags
  • Tupperwear
    • they take a lot of room in the cooler
    • eggs can be stored/ stuff them with paper towel to prevent breakage
  • Food getting wet in the cooler
    • store things like butter in period glass with rubber rings
    • vaccuum sealer works wonders for made ahead meals
  • We over pack because we are afraid of going hungry
    • this is where your menu is helpful
    • snacks for children- take 2 of their favorite and packs in appropriate wasy- children are too busy playing or too hot
Day Trips
  • Pack a picnic basket with cloth bags- Ziplock inside of them with snacks that do not need refrigeration.
    • Dried apples
    • Rasisins
    • Apples
    • Goober Peas (peanuts)
    • Jars of pickels
    • Jams/jellies with biscuts or bread
    • Cheese
    • Some ham or sausage

Friday, April 26, 2013

How to Improve Your Campsite Part 2- Becky

Here is my cont. notes on improving your campsite. There are great ideas of they types of food to bring!


Food
Think of what was in season for your location when you prepare your food! Here is MI's in season chart.
  • Make your food ahead of time and freeze it.
    • Soups, Stews, cooked chicken, roast ham, breads, muffins, cookies, etc.
  • Bring simple foods: Things you can eat hot or cold
    • Store bought precooked chicken-Rotisserie
    • Precooked fried chicken
  • Plan ahead: make a menu
    • Breakfast, Lunch, Dinner- How many meals will you purchase at the event?
    • Pre-wash potatoes, carrots, other items to save time/ convince
    • Do you like to make a big breakfast, or is your family happy with muffins/ fruit?
    • Hard boiled eggs- make ahead
  • Drinks: No soda/pop
    • Problems
      • They do not quench your thirst
      • Attract ants & bugs
      • Have to dispose of or hide the empty containers
    • Solutions
      • Make swizzel concentrate
      • Juice concentrate in cans- made by Welsher's
      • Frozen lemonade concentrate in plastic containers
      • Iced Tea/ pappy's Sassafras tea
      • Powdered Gatorade
Switzel Receipt- make 4 quarts:
1 1/2 cups sugar
1/2 cup vinegar
1/2 teaspoon ground ginger
4 quarts water
Mix the ingredients and chill

Barney's Switchel- makes 2 quarts:
1 cup sugar
7 tablespoons cider vinegar
1 tablespoon grated (or 1 teaspoon ground) ginger
1/4 cup lemon juice
8 cups of water, as cold as possible
Mix in large jar and shake well. Serve cold as possible and shake before pouring. I also slice a lemon thin and put it in for added flavor.

Shaker Switzel:
2 teaspoons honey
2 tablespoons cider vinegar
about 8 oz. water

Thursday, April 25, 2013

How to Get the Middle Victorian Look: Dressing to the Nines Part 1- Becky

I have posted this "Get the Look link" when I was organizing the blog some time ago. You can get my suggested patterns on the link, but I will only be concentrating on the clothing line up.

And so, now you have trained your eye and saw large and small differences an era can have. You might even see similarities between fashion from 70 years a part! Aspects of fashion were reused and thought of as "new", but in reality, it was used back then too!


Now lets move to your clothing line up: Dressing to the nines!

Ever wonder what "the nines" meant? I searched for the classic saying's origin and found this:
"The first example of the use of the phrase that I can find in print is in Samuel Fallows' The Progressive Dictionary of the English Language, 1835. In his entry for the phrase 'to the nines' Fallows gives the example 'dressed up to the nines'..."

How appropriate!

It was how many layers a woman would wear in the Victorian Era..
.. Lets look!
  1. Chemise
  2. Socks
  3. Shoes
  4. Drawers
  5. Corset
  6. Under petticoat
  7. Hoop (or skirt supports)
  8. Over petticoat
  9. Dress
Brooke showing off her new chemise.
Lets start off with what you wear first! The Chemise is a loose, shirt like undergarment, that protects the skin from possible pinching from lacing the corset and it absorbs sweat, protecting the dress. They also maybe tucked into the drawers or "loose" and used as a modest petticoat (underpetticoat) at its appropriate length near the knee. Chemises were made of cotton, muslin, linen, and pima cotton.


Socks are self explanatory. Socks could be as short as mid calf to over the knee. You could wear plain, plaid, or clocked socks shown below.
Found at Jas Townsend & Sons
Remember when I mentioned that I wear all the appropriate underpinnings? But of course I do! Drawers were introduced near the 1830, but before then women had no type of underwear. The reason for this was that women didnt need them. The purpose of underwear is to protect the clothing from natural body oils and fashion before 1830 were of loose skirts. Drawers became more essential to wear as the clothing became closer to the skin. However, during the time of the month, women would tuck, and use the drawers as extra protection.

The interesting thing about drawers are the fact they do not have a crotch. They are split! I see many new reenactors who are very modest and would not touch split drawers for that reason. But you would wear a underpetticoat to cover up! I find that split drawers are VERY useful when "visiting the lollielocks". I couldnt imagine fussing with the layers between under the petticoat, above the corset and then to put the drawers back in place. It is defiantly a time saver! Drawers were also made of cotton, muslin, linen, and pima cotton.


Believe it or not, shoes, are the next thing you put on! Once you put on your corset, you will not be able to touch your toes easily. I have done this more than I would like to admit! Fugawee and Robert Land are my personal favorite and they have also been compared in a VERY long list of forums. You can find decent black shoes at thrift stores too! I advise saving up for the wonderful, comfortable shoes of Robert Land or Fugawee.
Fugawee
Robert Land  

I cannot stress how much a corset is essential to getting the right look! It is more important than a hoop or a dress! A corset forms the body to the shape of 1860 and supports all of the petticoats and hoops! Can you imagine your hips carrying all the weight of the skirts and dresses? Their called "skirt supports" for a reason! Don't be discouraged about the price of a well fitted corset or the many parts to make one. Save your money for an experienced historical corset maker, or take your time making one. If they are fitted well, they are more comfortable than a bra! 

Samantha
Here are three wonderful examples of a well fitted corset on  ANY body shape!
Myself, Becky
Katie


If you wish, take some time looking at these wonderful corset makers as I take a break from your clothing line up!

All women do custom corsets.

Wednesday, April 24, 2013

How to Get the Middle Victorian Look: Training Your Eye- Becky

In response to Veronica's original comment: What is your foundation under your dress as far as hoop/ petticoats? It's such a lovely shape. :)

I LOVE this question! I never thought of some stranger would walk up to me and play with my skirts, figuring out how they were supported, but I really have had some people foundling me before! For this reason, I have started showing off "whats underneath" at the Greenfield Village's fashion show.

There is no doubt of my thoughts on wearing historical underpinnings. And to give you a little TMI, I wear absolutely NO modern clothing while I wear my historical clothing. If you dont understand, you soon will.

I know how becoming a reenactor you just want to jump right in! You want a fancy ball gown and all this fun lacey stuff! And no doubt wearing all of that IS fun! But to save YOU time and money, first we must train our eyes and be realistic.

We must study and recognize the different shapes each era creates. I have laid out three distinguished fashion plates within 50 years a part. Like todays world,  you would not want to be wearing your grandmothers clothing (unless your reenacting 1940-1950's lol).


1830
1860
1880
Here we can clearly see a change in the 30 years between each fashion plate. It is not only the dresses that are bold, but the silhouettes make the boldest statement. One could NOT wear a dress without its proper support.

Take time to exercise your mind and see the slowly, but surely, transition from one era to the next. I find it fascinating that one small change from year to year eventually makes a large change between 15+ years later! 

Kristen: A small rant that has nothing to do with reenacting

Yesterday I was heckled by a group of teenagers whilst training for my 5k. Since there are many female readers on this blog, I thought I'd share my response. I apologize that it has nothing to do with reenacting!


To the girls who called me “thick” when I was running;

At first, I thought you were going to murder me. You pulled up in a dirty car, slowing down ahead of me to get my attention. When I saw it was a group of females, I relaxed a little. I thought my sisters! Women who are on my team! They don’t want to hurt me, they want to support me! Never could I be so wrong.

One of you rolled the window down, and sneered “Girl, you’rethick!” I’ll admit my running shorts are on the tighter side. A year of full time work teaching teens and finishing full time master’s classes had taken its toll by a few pounds. But I don’t think you targeted me for my shorts. It was my high school shirt, one that I've kept around for 8 years after graduation.The comfortable “CHS” caught your eye because you thought I was in high school. And vulnerable.

The only response I could muster for your insult was a quick“I’m Mexican!” and I turned to keep running. I had been running non-stop for 3 miles already, and was just hitting my second wind. I could hear your laughter down the next block. I was actually a little ashamed; I am proud of the Latina body, strong and able. I am proud of my strong legs that push me through a 5k. I’m proud of my stomach, which is filled with healthy foods. I worked hard for that body you so carelessly tried to destroy. That's not what bothered me.

You thought I was a teenager. You wanted to make me feel awful; I am angry because I teach those girls. I take them aside at school when they are bullied for their weight, drying tears or building them back up. I want to obliterate anything that hurts their self esteem. Yet I realized, as I continued to jog, that I could not eliminate a group of teenagers.

So next time, girls, you decide to bully someone, use your head. You words and actions did not affect me, except to add 5 seconds to my 5k training session. Realize that you are cowards, that one day that weight will fall upon you easily, and you will look to your other sisters for support and love. You will receive it, because we forgive. But we do not forget.

Ps-Also, if you are heckling a runner, please don’t do it from the lazy vantage point of your car. You look like an idiot.

Sincerely,

Kristen, a jogger from Michigan.

This is me, doing something healthy. Note the lack of bullying taking place.

Tuesday, April 23, 2013

How to Improve Your Campsite Part 1- Becky


Ive had these notes for sometime and I love referring to them so much, I posted them on my other, now deleted, sewing blog.

Mrs. Root has been a member of the MSAS longer than I can remember, but she tells me that she began reenacting 1812 way before Civil War. So to say, She is mature in reenacting! She is also very knowledgeable and produces fabulous research such as the Civil War cosmetics I have been posting!

Mrs. Root helped the 21st Michigan with a presentation on how to improve our campsite. I was so intrigued that I took very detailed notes! Here is part 1 of 3 notes that the lovely Mrs. Root presented.

Improving your Civil War campsite notes by Ms. Root; Modified by Becky Assenmacher

How to Improve your Campsite
  1. Challenge yourself  by trying to bring as little modern items as possible.
  2. Find ways to cover up or store your modern items in a period way.
  3. Take it a year at a time. Pick one thing to improve on each year.
  • Have separate toiletries for camp and home. Keep camp toiletries together in a box.
  • Make your own blocks of ice for refrigeration.
  • Bring medication
    • Glass bottle with label
    • Tins painted black. I.E. Altoids tin boxes
Food and Kitchen Items
Storing:
  • Wooden Boxes- make sure that the boxes are easy to handle when full
    • Painted= personal belongings
    • Stained= shipped for market
    • Stencil with name
  • Baskets
    • make liners of cloth to help keep things from falling through
    • keep handles short as possible- no Easter baskets!
  • Tins- Can be painted black/ stenciled for storing breads and baked goods
    • Cookie tins
    • Christmas cookie tins
    • Coffee tins
    • Wood boxes
      • All can be painted and stenciled with dark NATURAL colors
        • metal primer
        • black gloss
        • Flur de lis and alphabet initials are good stensile
          • Lady's Magazines
  • Cloth Bags
    • Have variety of sizes
      • loaf of bread
      • Ziplock
      • Pringle
  • Brown Paper or Freezer Paper tied with string
  • Crock pot- needs to have cork or wooden lids (ants can go trough cork)
    • Mason Jars should look like this:
  • Canning Jars- needs to have cork or wooden lids (ants can go trough cork)
  • Glass Bottles- (bring funnel)
    • Lixar bottles
    • Olive garden wine bottles
    • Wicker basket around wine bottles are appropriate
Storage uses

  • Wooden boxes
  • Baskets
    • Peanuts
    • Anything seasonal
  • Tins
    • Rice
    • Flour
    • Sugar
    • Powdered drink mix with scoop
  • Cloth Bags
    • prewashed
  • Brown paper/ freezer paper
  • Crock pot
    • Butter
    • Pickles
  • Canning jars
    • Pickles
    • Peaches
  • Glass bottles

Sunday, April 21, 2013

Kristen: Sewing under pressure

Hello dear reader, I have returned to the blogosphere! I am currently writing a few papers for my master's classes, and they have sucked any creativity and happiness from myself. Seriously, I often wonder the use of such pressure on students, as it can have an ill effect on their work...

In any case the Greenfield Village reenactment is coming up May 25-27. This is perhaps the busiest time for a reenactor, as there are dresses to finish, camp equipment to purchase, and presentations to practice. I consider April and May the mad dash to the finish line. I have looked back at my goals when we first started the blog in January.

Big projects
1. Finish sheer mourning dress completely by hand
I still need to attach a collar for this dress.
2. Finish blue floral dress
I am mostly done, just work to the waistband and hem. Also a collar.


Small Projects:
1.   Rosette belt, similar to many I have seen already
Haven't started this yet, though I want one for the floral dress.
2.   Paper flowers for my bonnet. My Dad bought me a book with so many ideas!
Another project I've yet to start! Though I will be going to a bonnet decorating workshop soon.
3.   Silk sewing case from the same book. I haven't yet decided on the shape.
I've made a few of these. There's one in my etsy shop:
https://www.etsy.com/listing/123079191/civil-war-cotton-sewing-case?ref=shop_home_active

I also had the opportunity to recover another parasol. I was proud to finish it!


I was starting to feel bad, that I had not been doing enough sewing. In reality, I've completed at least 3 projects in the past month, lost 5 pounds, and have almost finished the final papers for both my master's classes. This past Friday I played 2 indoor soccer games, spraining my ankle in the process.

I think I deserved the break!

Once I turn in my papers next week I'll have more time to finish projects. Hopefully I'll get through everything with enough time to prepare properly for Greenfield Village. The countdown begins!
~Kristen

Becky: Blond Bonnet Form

Yay! My bonnet is done!
I still need to remove the parchment paper and finish the edging.
But look where it began!
I completed both bonnets up to this stage. I had to wait to borrow a ham, then later buy one to form the back of the bonnet.

I find the most difficult part of making a bonnet is getting that tab of straw to fit over the gap. The back of this bonnet protrudes more than what I would like it too.
I hope the forest bonnet, Im making for a friend, will have a little cleaner back than this one for me. 

P.S. There is 33 more days until Memorial Weekend at Greenfield Village! 


Wednesday, April 17, 2013

Becky: Greenfield Village, Dearborn MI Opening Day

This was such a fun day! A whole group, of about 15 friends, showed up to the Grand Opening to Greenfield Village in Dearborn. The morning was cold and nippy, we were all intensely watching the weather report, but the day turned out perfect!
Ken Giorlando, Lynn Anderson, and I
Our first stop, as usual, was Firestone Farm where another friend, Larissa, works! In the morning, the girls were making "supper" or lunch. Larissa was cutting pork, but was having a real tough time with the dull knife.

Larissa and her coworker making supper
As we traveled out to the barn to great any newborns and new employees, we heard from the window of the house, "Hey you hooligans! Get off my lawn!" It turned out to be Larissa yelling at us from the window!
She opened the window to yell "Get off my lawn!"
Our leisure walk directed us to the Eagle Tavern. I think our stomachs led us there more than anything else.


Even more friends showed up just while we were ordering food. What perfect timing! Here are the ones who dressed up in period clothing to start the year off right.
The food was fabulous and very yummy!


Ken Girolando and Chris King Dye settiling their stomachs.
After the awesome meal and mingling we did at the tavern, we traveled to the other farm: Dagget Farm. Here I found this amazing woodpile. we were informed the design of piling wood like a beehive, allowed air to make a whirlwind effect inside to keep the wood dry in any weather.
Fierce firewood pile 

Thanks for visiting and I hope you can visit Greenfield Village too!
*Photo credits go to Lynn Anderson and Ken Girolando

On My Bookshelf: December

December has been a really rough month. Between what happened in Oxford (not far from where I live...) and just the general pandemic issues,...