(North and South Emporium will sometimes have them in stock here)
Of course my fingers itch to try it, rather than simply buy it. While I need to finish a few things, I did need a break. I know on the site they listed it as a blue linen, but of course I had to use my favorite color, red! I also bought 20 yards of 2 different thicknesses of cotton twill and 3 leather buttons.
I used 1 yard of the red linen ($3 with coupon) and measured out two circles with paper plates (thank you Sally for the suggestion!). The large rectangle piece was cut at about 27 inches by the circle around the paper plate. Then I cut from the 20 yards of cotton twill tape ($7 with some left over) and decorated the red linen with a pretty, freehand design. The handles were next. It's not perfect, but it's mine!
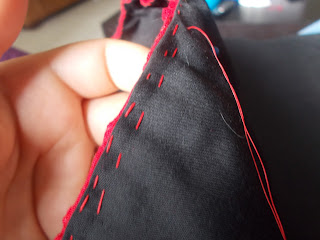
Next I found some black cotton from my stash (free!). I attached it to the back of the red linen so the edges would be finished. I did everything by hand! Then I took the rectangle and attached to the 2 circles, leaving an inch overlap to allow for my buttons. I had originally planned to only hand stitch, but I wanted the circles to be reinforced, so I used the machine.
The 3 leather covered buttons ($8) went on easily, though my button holes were not that great. I still need to practice those. I think it turned out quite nice!
It's not perfect, but not too bad for a first try. I'm thinking of all those day events, when I need something small to carry all the little things, like a shawl or a parasol. It could also be good for carry petticoats to an event. In any case, I love it! Here is my to do list for the next few weeks:
1. Finish mourning bonnet
2. Finish gold dress
3. Recover Felicia's parasol
4. Make 1 handkerchief
5. Start next sheer dress


Is that black cotton tape that you decorated the bag with? I've been thinking about making a bag this style for all my son's things since I saw it at Greenfield this spring.
ReplyDeleteYep! I purchased it at Haberman's in Royal Oak. It was incredibly easy to put together, and a nice break from the usual dressmaking. This could be an afternoon project, especially if one doesn't add too many frills.
DeletePs-I read your blog, and might be swiping some meal ideas!
~Kristen
Swipe away! Meal planning is so incredibly difficult for me that I fully support taking inspiration from wherever it comes.
ReplyDeleteI was hoping to run to the fabric store before leaving for Charlton on Friday so maybe I'll luck out?
I just wanted to say thank you for for taking the time to post how you put yours together. I just started doing 1881 reenactments and need a diaper bag ;) This is an easy, quick and inexpensive way to take care of that. Thanks :)
ReplyDeleteHi! I am trying to make my first bag and cut my side circles 9 inches around in linen.
ReplyDeleteWhat size was the square/rectangle you cut for your bag to fit? I did a 21 by 21 inch square and it's too small to go around my circles.
Thank you for any advice you might have.
Hmmmm I went back and measured. The side with the opening of the bag measured just over 20 inches, while the side that goes around the circle is much larger, though I'm having trouble getting an exact measurement now that it's finished (a little over 27 inches I think?). I will go back and revise the original post, though I'm sorry for the miscommunication!
Delete~Kristen